
Over the past 6+ months, I have been writing a lot of Rust, an awesome programming language with the speed of near C or C++ performance but without all the security issues that come with it. One of the key spaces I wanted to try using Rust was in the web backend space since most languages must have an easy and fast way of building web applications.
After looking online for “the best Rust web framework”, there were two major choices: Actix or Rocket. Both of these web frameworks have very similar design patterns unlike other languages such as Python’s Flask and Django which are very different.
After some testing using both frameworks, I decided to go with Rocket as it supported some features I was looking for, for an up coming project I am building (stay tuned for that one). Actix is a great framework despite its issues in the past (see Ben Awad’s 2020 video on the subject), it’s a blazing fast! web framework and comes with some nice features.

Now the introduction is over, lets write and launch ourselves a blazing fast web application!
Note: This blog post isn’t about how to learn Rust, so if you are looking for that take a look at the Rust Lang Book.
All the source code for this project is on GitHub.
Introduction to Rocket
Rocket is a very fast web framework for Rust providing a powerful, flexible, and secure API. It also allows us to write asynchronous code with type safety built right into the language.
Let’s first of all create a new Cargo project for our test app (install Rust & Cargo here).
# Create new cargo project
cargo new rocket_app && cd rocket_app
This will create a folder called rocket_app which contains all the boilerplate Cargo and the src/main.rs entry point.
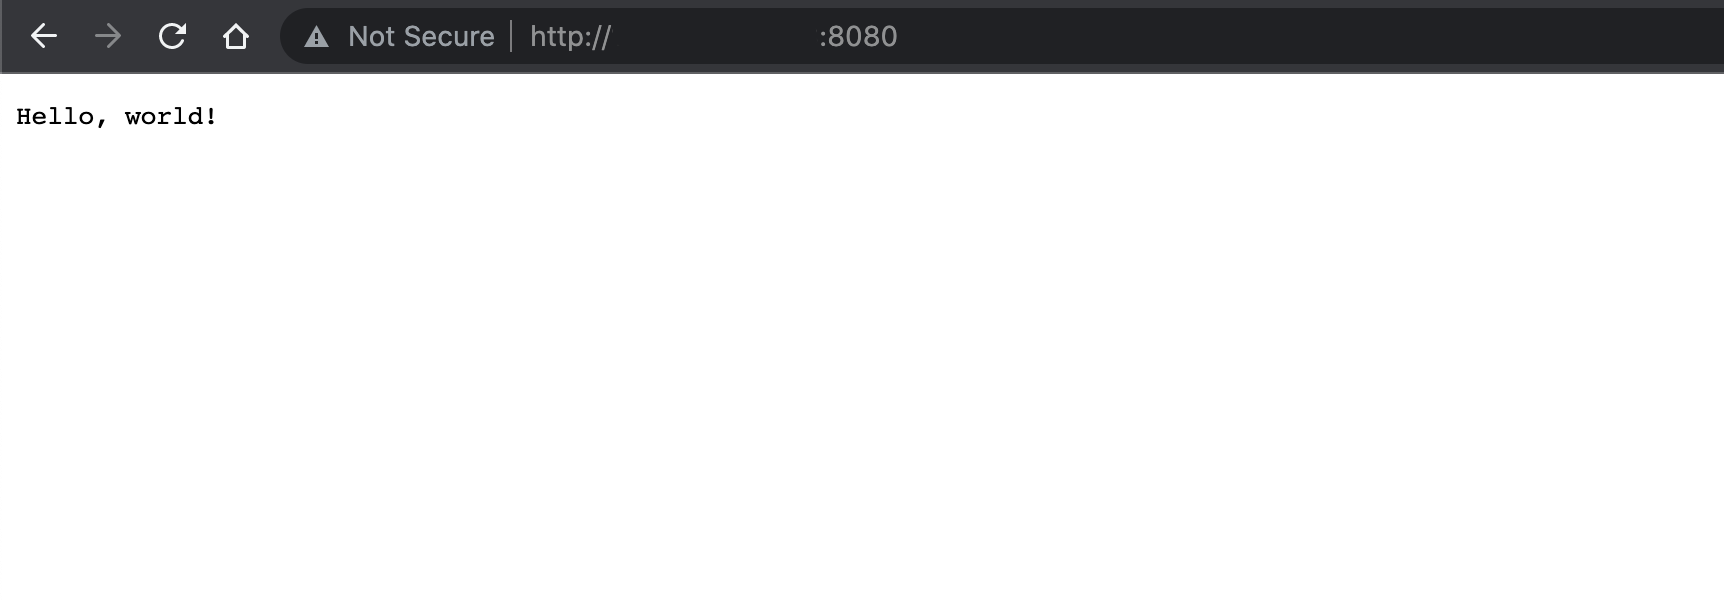
You can make sure the project was setup correctly by running cargo run which should return a “Hello, world!” text.
The next stage is to open up the Cargo.toml file to add Rocket as a dependency to Cargo.
# ...
[dependencies]
rocket = { version = "0.5.0-rc.2", features = ["json"] }

# Additional dependencies for logging
log = { version = "0.4", features = ["std", "serde"] }
env_logger = "0.8.4"
Pro-tip: Use cargo-edit commands to add, update, remove or audit Cargo dependencies.
I’m installing version 0.5.0-rc.2 (release candidate) versus 0.4.10 (stable release) as there are some nice features coming in the new version that I want to use.
Please use either/or for this tutorial.
Alternatively, use the latest version if you are reading this in the future where new releases are available.
Additional to installing Rocket, the snippet also installs Serde (serializing and deserializing Rust data structures) and log / env_logger which can be used.
Before we start writing our first bit of code, let’s setup the Rocket.toml file in the root of the directory.
[debug]
address = "127.0.0.1"
port = 8080
workers = 1
log_level = "debug"

[release]
address = "0.0.0.0"
port = 8080
workers = 4
log_level = "normal"
This configuration isn’t needed but has some really nice features built right into it, such as log levels, interface to bind to, port numbers to use, etc.
Now let’s edit the main.rs to create our first route to the application.
#[macro_use] extern crate rocket;

use log::info;

#[get("/")]
fn index() -> &'static str {
    "Hello, world!"
}

#[launch]
fn rocket() -> _ {
    env_logger::init();

    info!("Ready to launch...");

    rocket::build()
        .mount("/", routes![index])
}
We’ll start by going over each part of the code.
Imports and Macros:
#[macro_use] extern crate rocket;
use log::info;
The first line tells Rust that we want to use the macros from the Rocket crate in our crate / binary directly without having to import each feature. These features are used heavily when building a Rocket application.
The second line is us importing the log crate and, in particular, the info!(...) macro.
This allows us to use a dedicated logger which is configurable versus using println!(...) macro which isn’t configurable but great for debugging.
Defining a function as a Rocket route:
#[get("/")]
fn index() -> &'static str {
    "Hello, world!"
}
The first line is an Attribute Macro from Rocket we imported from the Rocket crate.
In this case, we are defining a route with two rules.
The first being that this route is a HTTP Get Method, and the second being the route path is "/" relative to the mount point (we’ll talk about this shortly).
This is annotated around a Rust function that can return various types as the responding data.
In this example, a static str which is returned as "Hello, world!"
Launching our Rocket:
#[launch]
fn rocket() -> _ {
    // ...
}
The first line is another Attribute Macro which generates a async fn main() { ... } function stub of code for the application.
Because of this, our application’s code doesn’t need a main function.
This attribute wraps our rocket function which acts like a “Rocket Builder”.
env_logger::init();
info!("Ready to launch...");
The next part sets up a logger for us using configurations from the environment.
After that, we simply use the info!(...) macro similar to a println!(...).
rocket::build()
    .mount("/", routes![index])
The final part of our code initialises a Rocket using the rocket::build() function which uses a builder pattern to construct the Rocket.
This returns a Rocket Struct which represents the web application.
After the build function, we can call a number of functions which setup the Rocket into the state we want.
The one we are using is the mount() function which allows us to define a base path or "/" and a list of routes.
These routes are wrapped in a macro called routes![i1, i2, ...] which returns a Vec of routes.
The relative path discussed before is appended to the mounts base path.
So if you have a relative path of /world and a mount base path of /hello the route generated would be /hello/world.
Launching the Rocket!
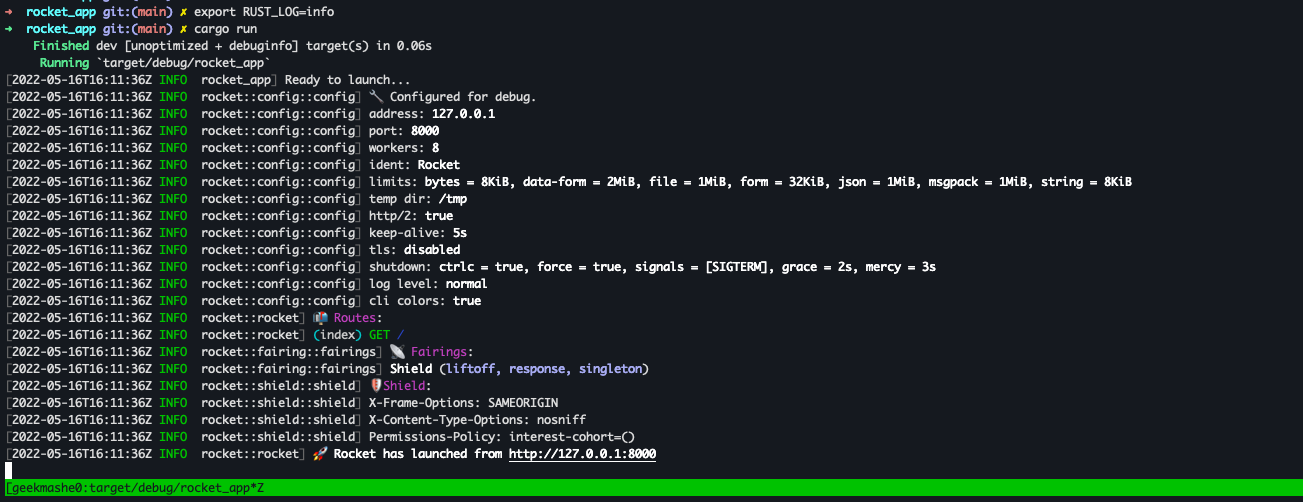
Now let’s build and launch our rocket into orbit!
# optional
export RUST_LOG=info

cargo run
We can see the log output of the launched Rocket.
Pro-tip: Use cargo-watch to automatically run cargo commands when a project source files has been changed.
With that, we now have a web application which returns “Hello, world!”.
This is great but a static string being passed from the backend to the end user isn’t useful. Here is when we bring in Server Side Templating in to mix things up.
Server Side Templating
Now we have a great understanding of Rocket, let’s add some HTML Server Side Templating into the mix. This is important for web applications so it’s useful for end users. We could use a front-end framework like ReactJS, VueJS, or Yew but for demo purposes this will work perfectly.
We’ll be using Tera, a Jinja2 inspired template rendering engine. It gives us support to pass variables from our Rust backend, basic logic blocks like for loops and if statements, and template components.
First things first, lets add dynamic templates to our Cargo.toml file.
// ...
[dependencies]
rocket_dyn_templates = { version = "0.1.0-rc.1", features = ["tera"] }
We can create a simple Tera template using Bootstrap (so it’s not plain HTML) and passing in variables into the front-end. Next,we’ll take a look at the Rust code.
use rocket_dyn_templates::{Template, context};
// ...
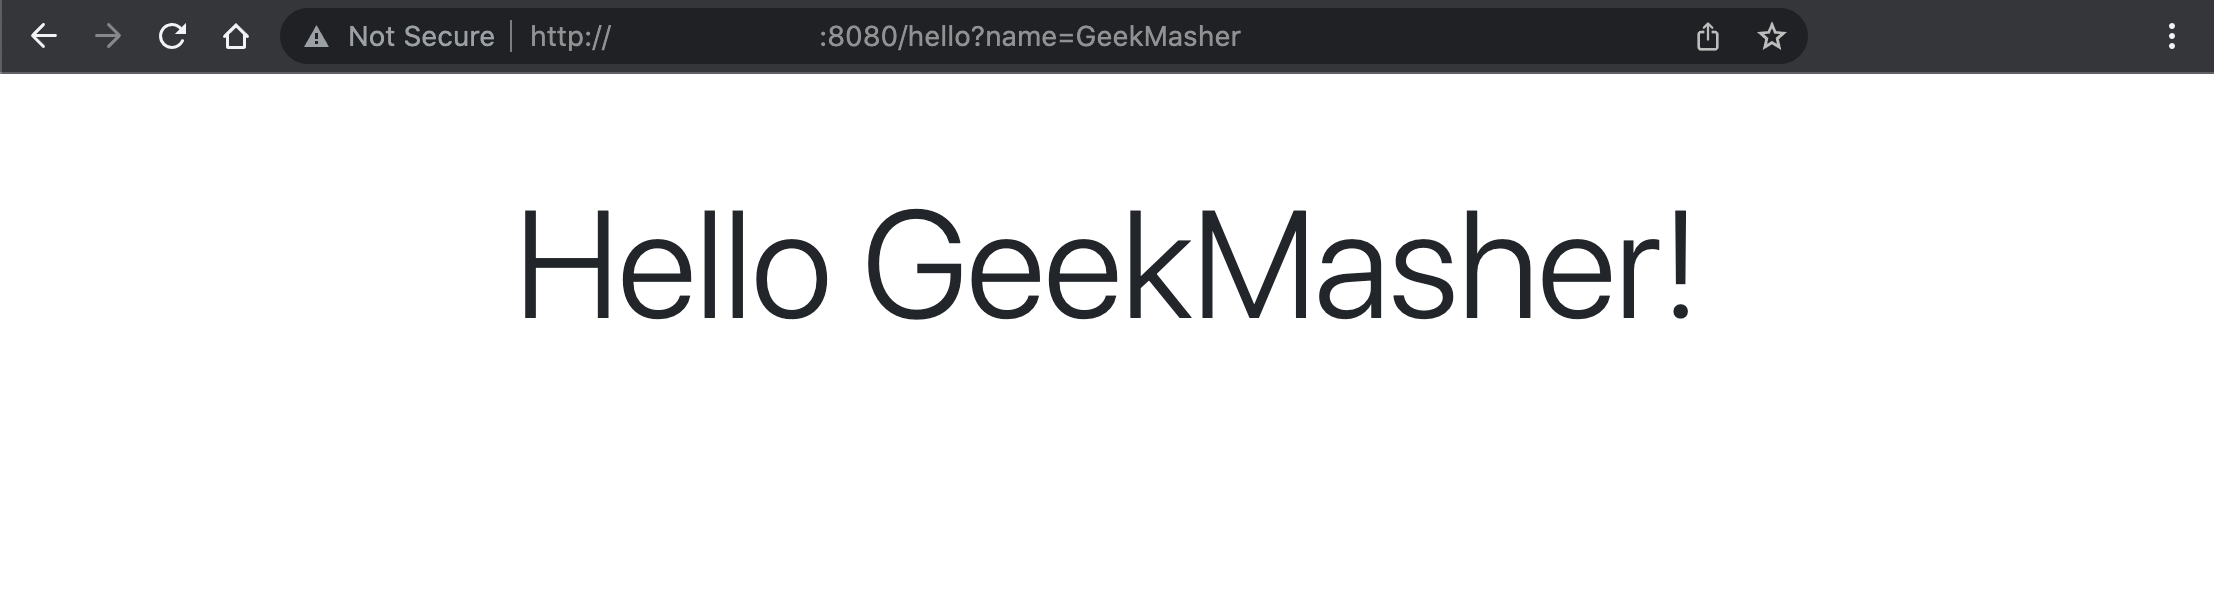
#[get("/hello?<name>")]
fn hello(name: Option<&str>) -> Template {
Template::render("index", context! {
title: "Hello",
name: name.unwrap_or("World")
})
}
#[launch]
fn rocket() -> _ {
// ...
rocket::build()
.mount("/", routes![index, oops, hello])
.attach(Template::fairing())
// ...
}
The hello() function uses the get macro which now uses a parameter placeholder <name> to define a dynamic parameter.
This is then automatically passed into the function by the macro as a &str.
Since I wanted this variable to not be required, I made name an Option which then can be un-wrapped or use a default value "World".
The return type is a Template which is then processed by the Template Fairing which we’ll talk about shortly.
The Template::render() function which comes from the rocket_dyn_templates crate allows us to specify the name of the Tera file template and the variables we want to pass in.
The context macro easily allows us to serialise the data for Tera to use.
The last bit that is required to get Tera templating working in attaching the Template::fairing() to the Rocket.
This allows us to use the Tera rendering engine or build a custom engine on any registered functions that return a Template.
templates/index.html.tera:
<!DOCTYPE html>
<html>
  <head>
    <meta charset="utf-8" />
    <meta name="viewport" content="width=device-width, initial-scale=1">
    <title>Tera Example - {{ title }}</title>
    <link href="https://cdn.jsdelivr.net/npm/bootstrap@5.2.0-beta1/dist/css/bootstrap.min.css" rel="stylesheet" integrity="sha384-0evHe/X+R7YkIZDRvuzKMRqM+OrBnVFBL6DOitfPri4tjfHxaWutUpFmBp4vmVor" crossorigin="anonymous">
  </head>
  <body>
    <div class="mx-auto mt-5 text-center" style="width: 850px;">
        <h1 class="display-1">Hello {{ name }}!</h1>
    </div>
    <script src="https://cdn.jsdelivr.net/npm/bootstrap@5.2.0-beta1/dist/js/bootstrap.bundle.min.js" integrity="sha384-pprn3073KE6tl6bjs2QrFaJGz5/SUsLqktiwsUTF55Jfv3qYSDhgCecCxMW52nD2" crossorigin="anonymous"></script>
  </body>
</html>
This template defines variables and uses other Jinja2 features.
Both the variables {{ title }} and {{ name }} are both passed in by the Rust code and renders encoded values to avoid XSS security issues.
Now we have server side rendering, we have all the features we need to build a web application. The last thing to do is handle errors.
Error Handling
A small but important part of backend development is how to handle errors and thankfully Rocket has us covered.
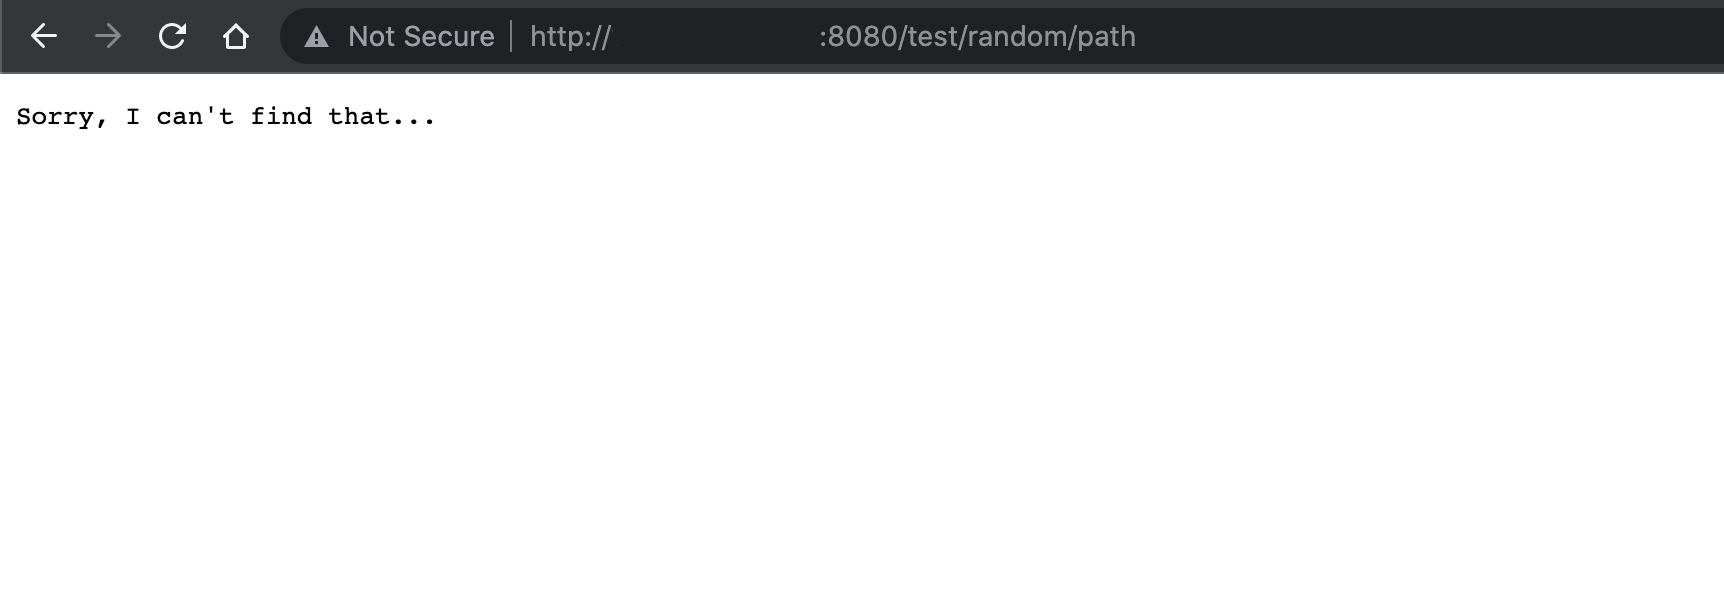
You can catch() Attribute Macro to create a Catcher when an error occurs either from a server side error (500) or a resource that isn’t available (4**).
// ...
#[catch(404)]
fn error_not_found() -> &'static str {
"Sorry, I can't find that..."
}
#[catch(500)]
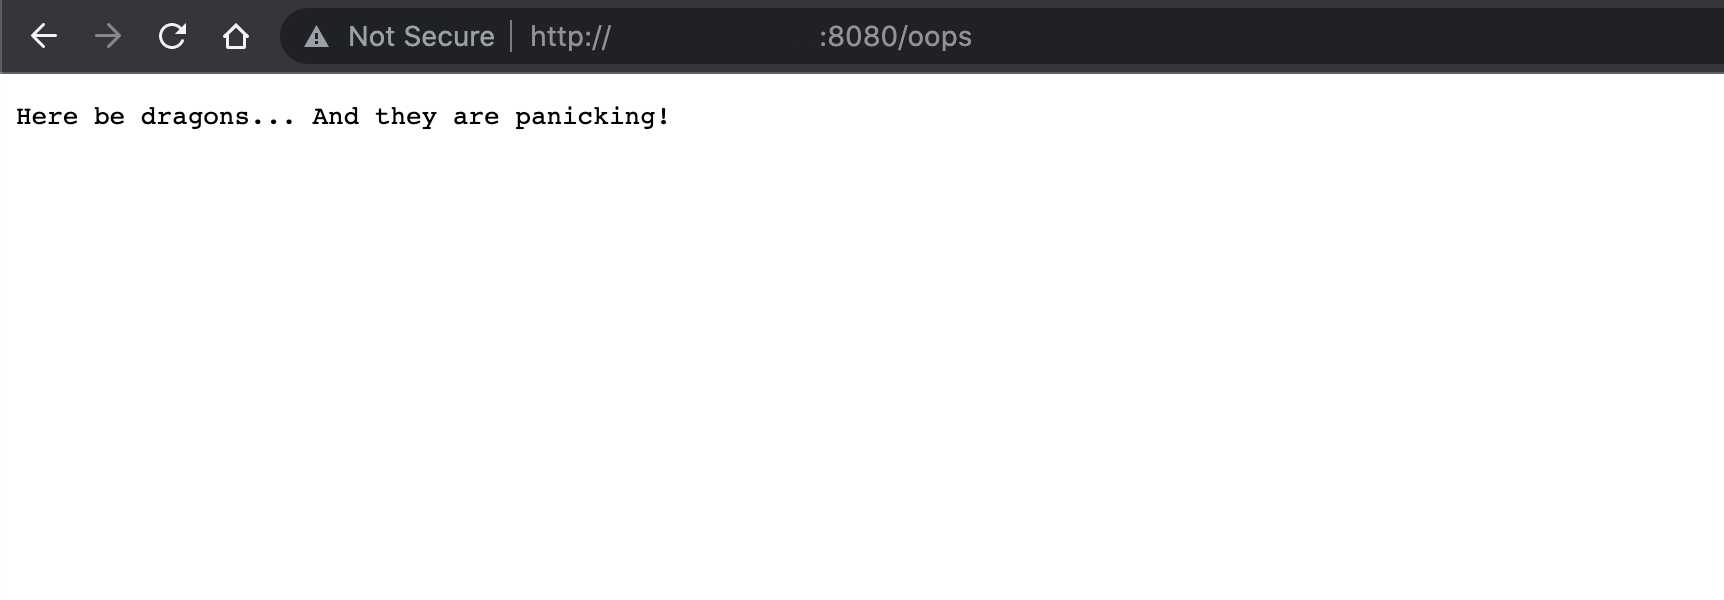
fn fatal_error() -> &'static str {
"Here be dragons... And they are panicking!"
}
#[get("/oops")]
fn oops() -> &'static str {
panic!("Here we go...");
}
// ...
#[launch]
fn rocket() -> _ {
env_logger::init();
info!("Ready to launch...");
rocket::build()
.mount("/", routes![index, oops])
.register("/", catchers![error_not_found, fatal_error])
}
The two functions fn error_not_found() and fn fatal_error() both handle different errors based on the error codes the catch Attribute has been set to.
All errors must be registered in the rocket build which is done using the register() function passing in again a base route and Vec of errors.
The Vec of error routes uses the catchers! macro.
If you now try to access a page that doesn’t exist, you receive this message:
If a panic occurs in any routes like in the fn oops() function, an error 500 is thrown and because we catch 500 errors with the fn fatal_error() we get the following access /oops:
Conclusion
Rocket is an amazing framework which reminds me of a framework like Python’s Flask which makes me very happy. There are tons of awesome features which I’ve only started to dig into.
Sergio Benitez (the creator and core maintainer of Rocket) along with the Rocket community have created a great web framework!
From now on when I’m writing a web backend application in Rust, I will be picking Rocket.